
I recently got a bee in my bonnet that Robert needed a sensory board. He's always fiddling with small objects, playing with lids, and exploring how his fingers work. After several trips to hardware stores, craft stores, and Target, we finally created this masterpiece:


Click to see more pictures.
Our board is 2' x 6' and full of things to explore, touch, feel, and manipulate. Even before we were finished, Robert would bang on the workshop door to see what was going on with this super-cool-clearly-for-him project.
Before starting construction, gather all of the objects you think you might want to include. Have a few extras because once you start placement, you'll discover that some things just work better than others. And raid the junk drawer before going to Lowe's or Home Depot! Hidden treasure can be found and you've already paid for it.
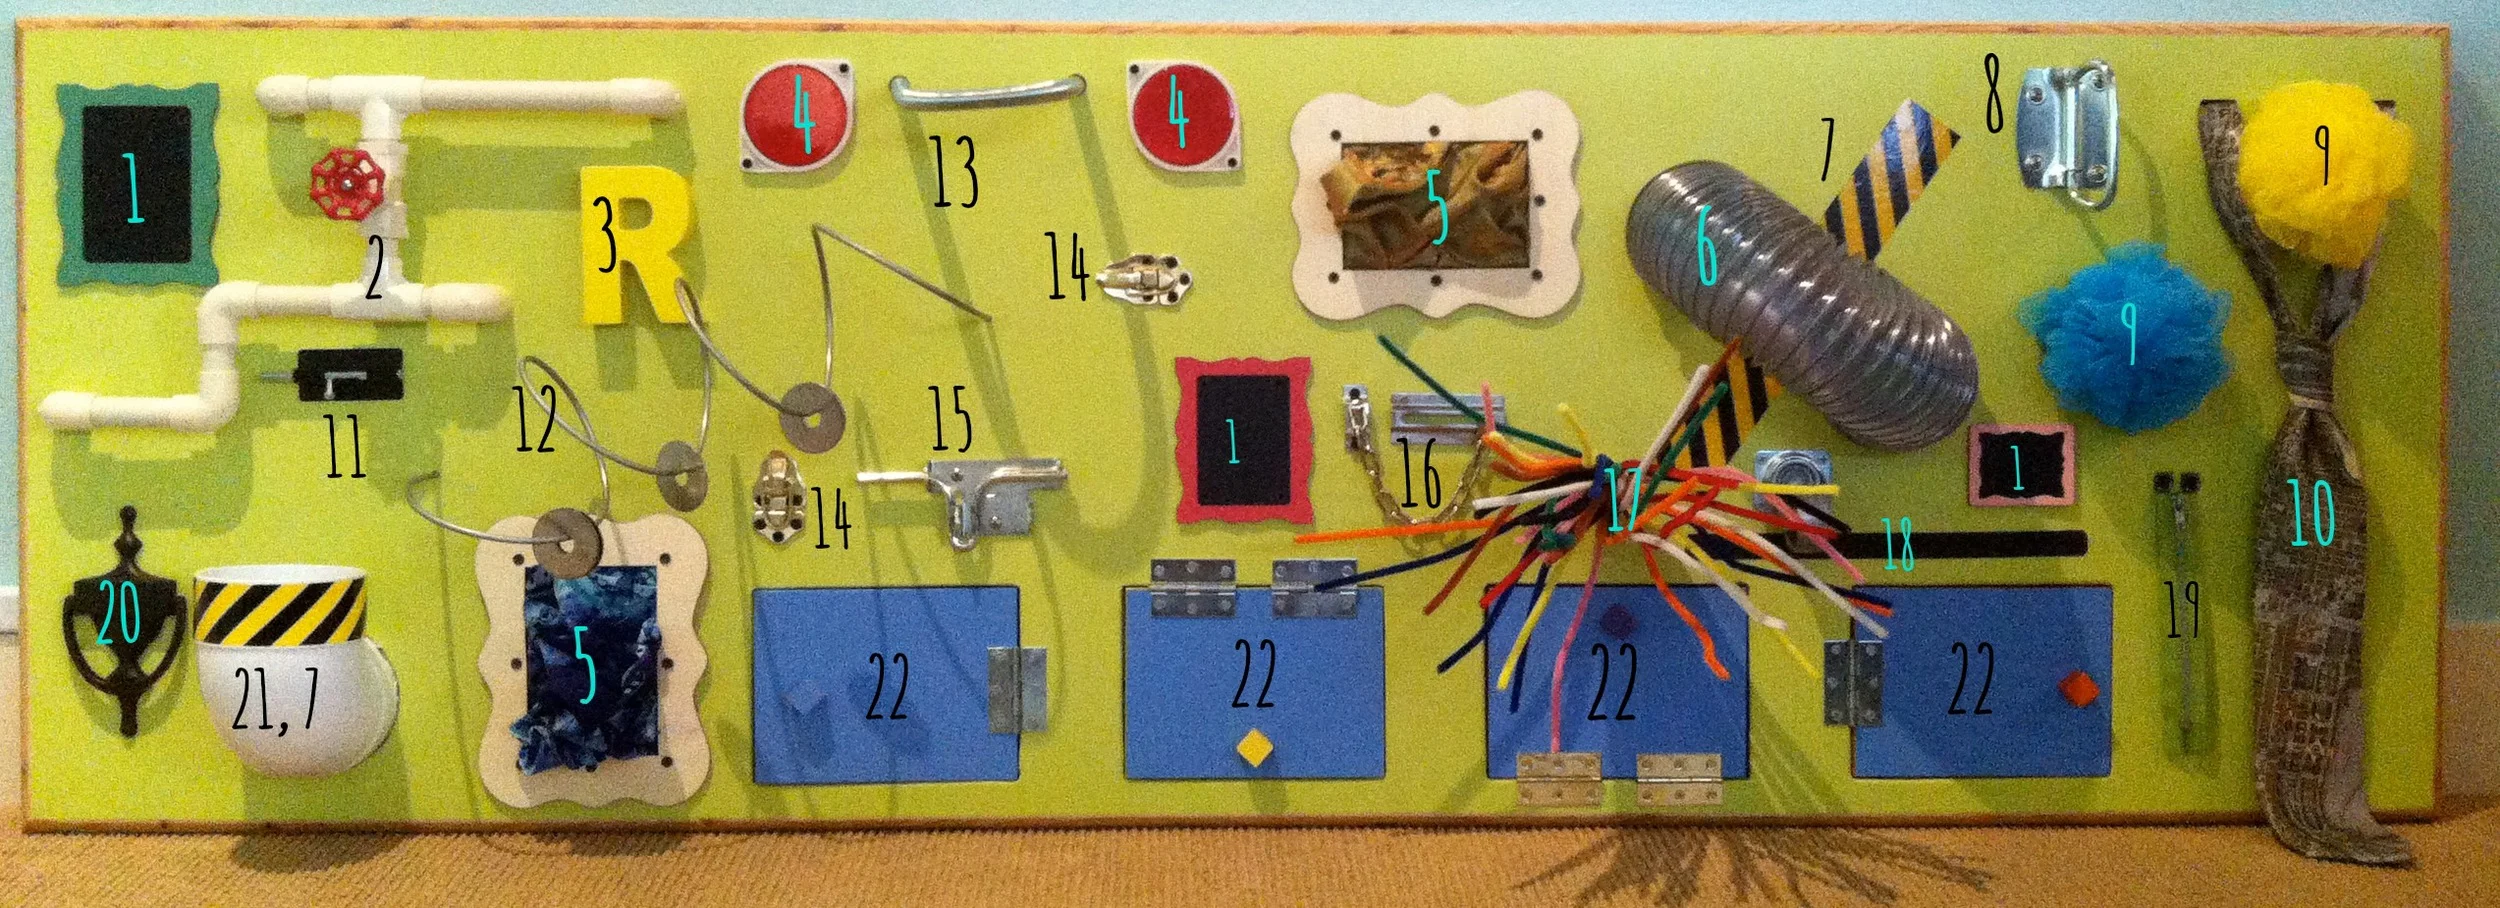
To create our board, we used:
- Chalk Board Frames (mounted with screws)
- Valve and PVC pipe (holes cut for tubes to go through the board and capped behind)
- Wooden Initial (mounted with screws)
- Reflectors (mounted with screws)
- Wooden Craft Frame with Fabric Scrap (mounted with screws)
- Flex hose (holes cut through, then mounted with screws)
- Caution Tape (self adhesive)
- Metal Handle (mounted with screws)
- Shower Poufs (hole through board, then knotted)
- An Old Tie (two slits through board)
- Latch (mounted with screws)
- Wire with Washers (hole through board, then wire kinked behind)
- Spring (mounted with screws)
- Latches (mounted with screws)
- Gate Latch (mounted with screws)
- Chain Lock (mounted with screws)
- Pipe Cleaner Explosion (hole though board, then knotted)
- Grip Tape (self adhesive)
- Zipper (mounted with screws)
- Door Knocker (mounted with screws)
- Plumbing Elbow (drilled hole and mounted with screws)
- Wooden doors with hinges. Hidden behind are 5x7 picture frames. (mounted with screws)
A good piece of plywood - or two, depending on the size of your board - an assortment of mounting hardware, and painting supplies are also needed. I suggest finding a good lumber yard for quality plywood. We used 3/4" paint grade maple. Some cheap plywood has been known to harbor things like razor blades and trash - stuff I don't want kids accidentally playing with!
To construct:
- Determine where you will place the sensory board and cut the plywood to size.
- Begin placing your items and play with the layout until you find something you are happy with. Do not attach anything yet.
- Take a picture to refer to during construction.
- Mark on the wood where you will need holes.
- If you are building doors, measure the size of your picture frames. Make the opening as large as the picture while keeping the frame "behind the scenes." This will give you the ability to mount the picture frames directly to the back of the board.
- Cut out the openings needed based on the placement and size of your objects. Jon used a jigsaw for larger openings and different sized drill bits for simple holes.
- Cut four pieces of plywood into 1" strips to create a frame on the backside of your board.
- Using wood glue and a lot of clamps, securely mount the four cut pieces flush with the edge of the plywood. Your board should have the appearance of being twice as thick as it actually is. If you're using 3/4" plywood like we did, you will have a board that is 1.5" off the wall when mounted.
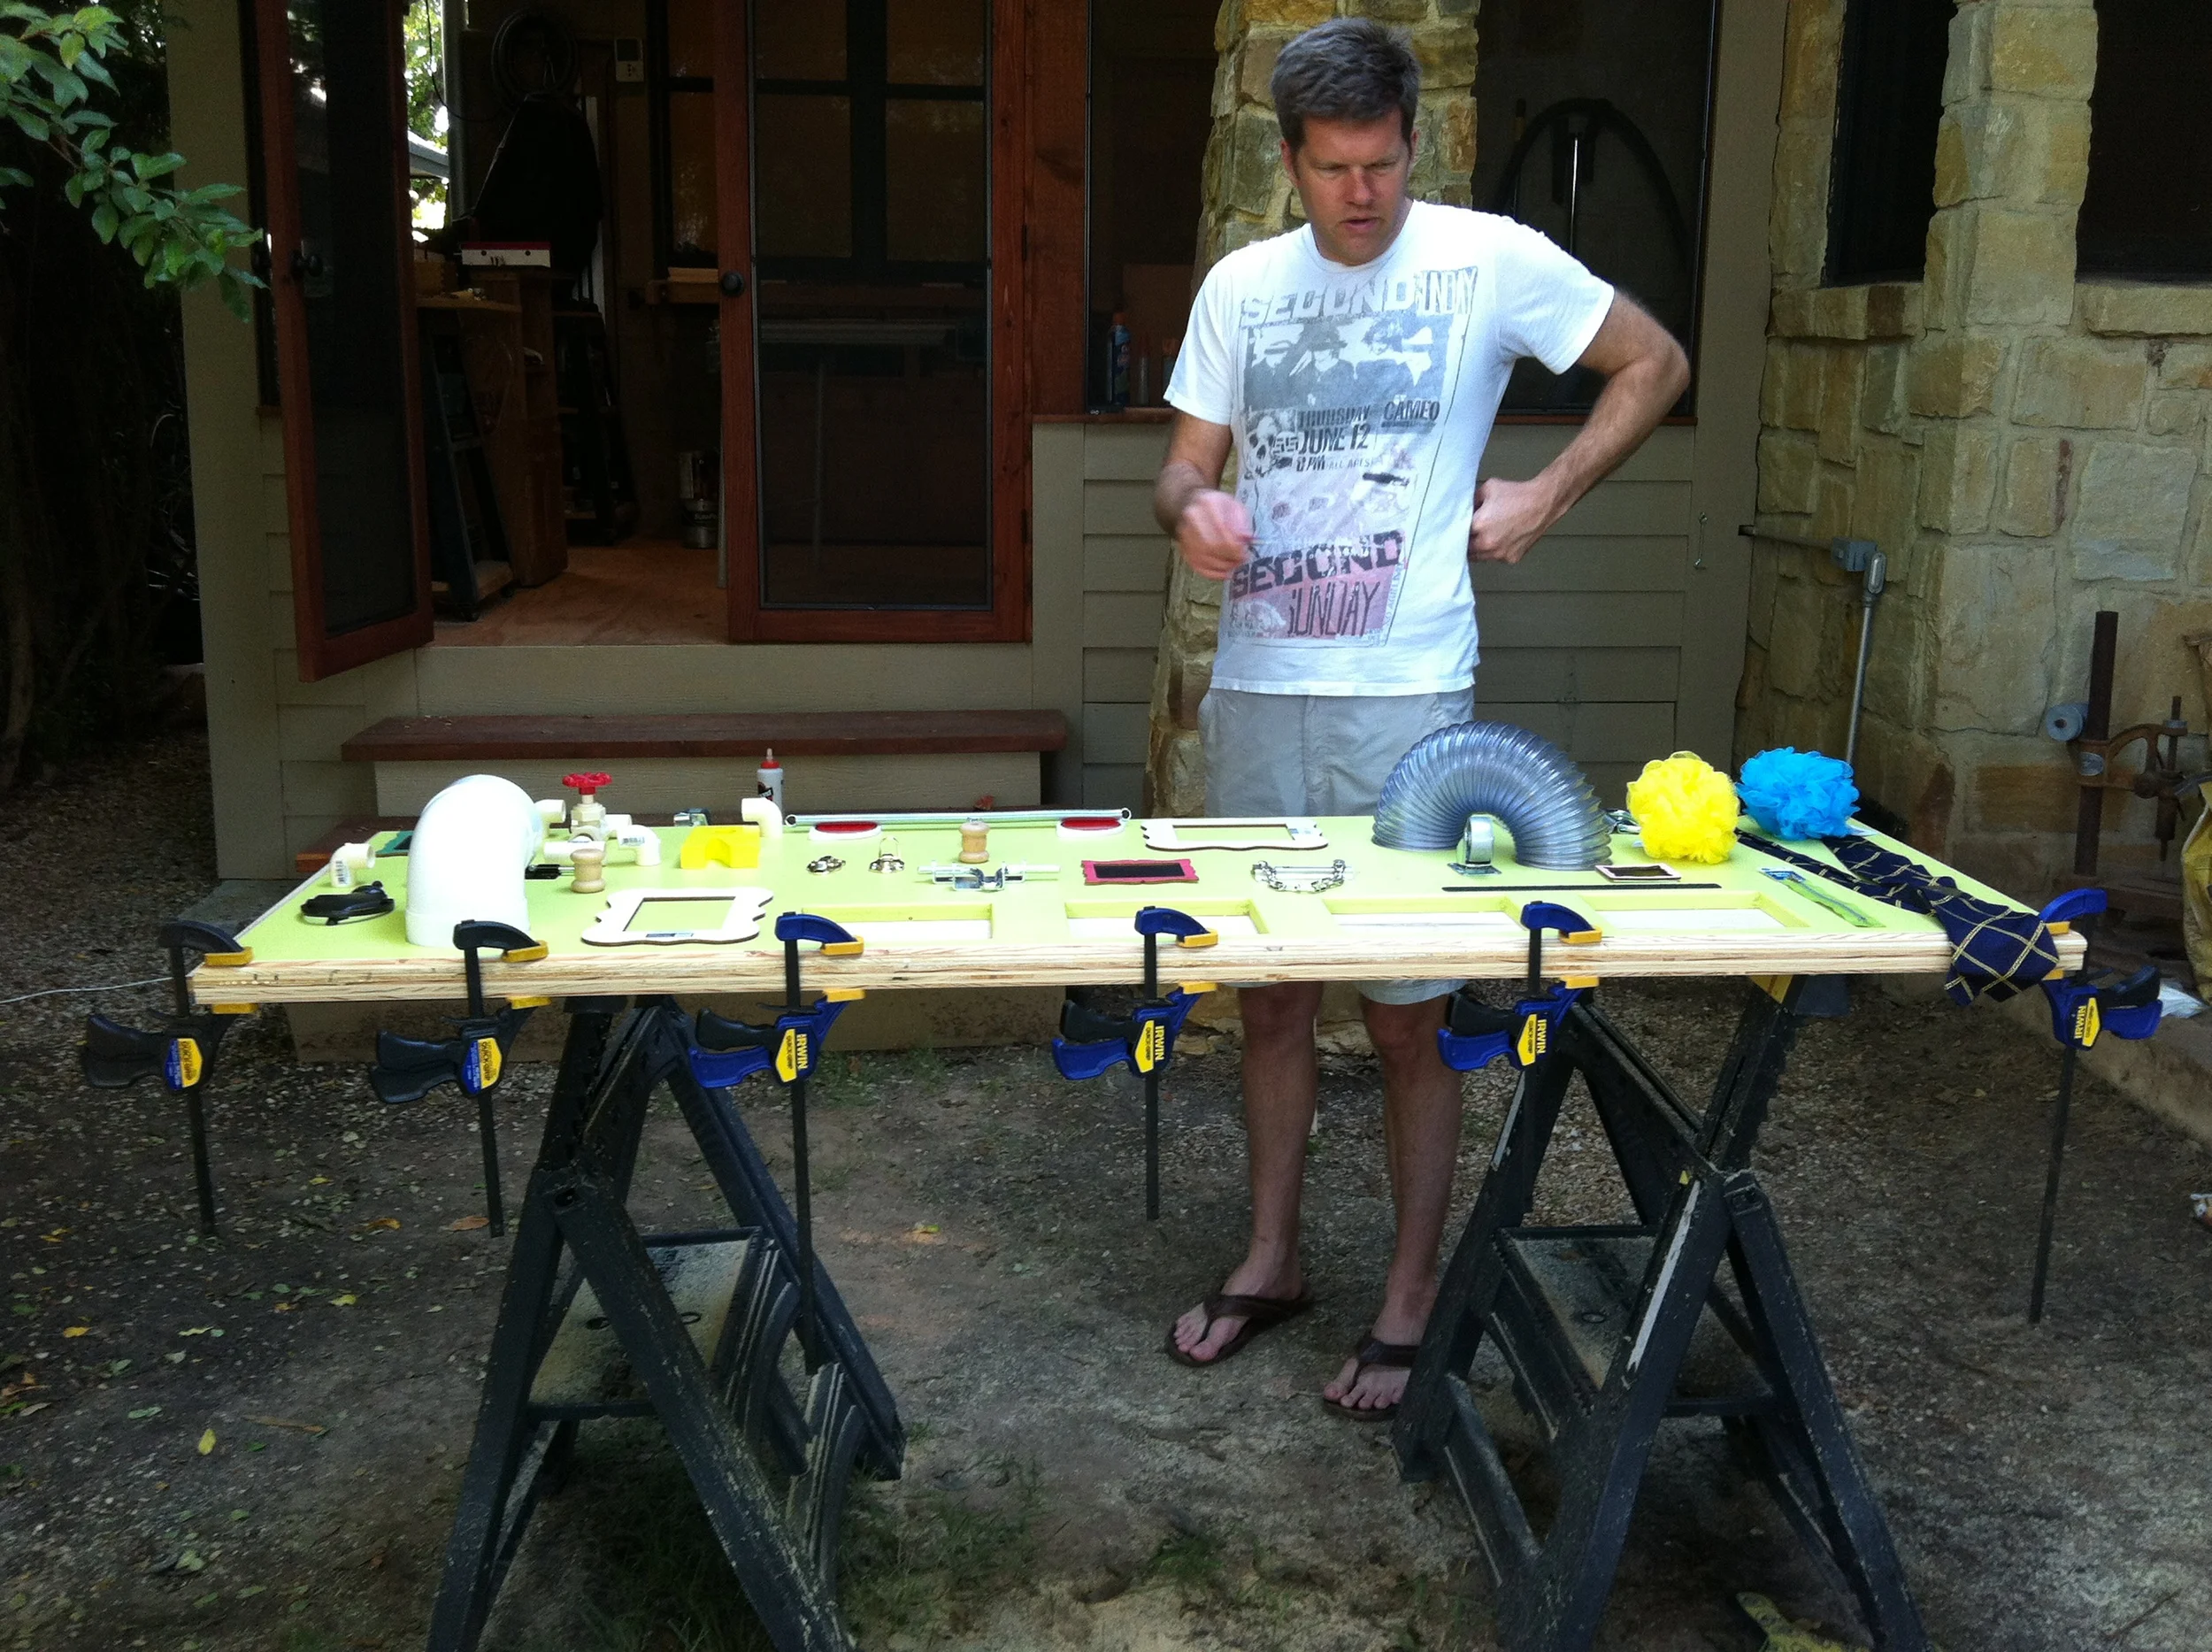
Jon contemplates our layout while the wood glue for the frame dries.
- Cut out doors. Make the door panels about 1/8" smaller than the opening.
- Once all of the holes are cut and frame mounted, prime and paint the background color of your sensory board.
- Prime and paint the doors in a contrasting color.
- Knobs can be painted as well, or you can use a funky assortment of ready-made knobs if you're sick of painting.
- To create the natural wood border like ours, route the edge of the board. Then sand down the sides for a nice smooth finish. Routing is completely optional. You can also paint both the front and the sides for a polished finish.
- Spray the entire board and doors with a clear coat for extra durability. We put on three coats of clear coat.
- Now the fun part - refer back to the picture of all items placed on the board and affix all of your items. Make sure everything is properly screwed in. This piece will take a beating so everything needs to be firmly affixed! Here are some tricks we learned:
- Careful measurements with PVC pipe mazes is a must! Measure and cut a piece, test, then use PVC cement to connect it to a fitting. Repeat one length of pipe at a time, testing the whole maze each time.
- The loop on shower poufs can be fed through a hole and knotted tightly behind the board.
- To affix a bundle of pipe cleaners, zip tie them together behind the board, then bend the pipe cleaners over.
- Make sure there is plenty of frame overlap behind the doors so the frames can be screwed into the back of the board. The doors should be able to close all the way.
- Use flat head screws to secure the knobs. Round head screws may scratch your frames.
- We painted numbers on the inside of our doors. Double check the position of the numbers when the doors are open before attaching hinges. Click below to see how our doors work.


- To mount the board on the wall, find your studs. Use appropriate hardware for the size and weight of your board, and mount both the top and bottom of the board to the wall. Err on the side of caution and use too many screws.
Now is the fun part - let your little people play! Robert and friends are constantly discovering something "new" on this board. We expect to have it up for a long time.